
You may remember last year, I had a lot of fun drilling and carving pumpkins. This year, I decided to use Pinterest again for some more pumpkinspiration and came across these melted crayon versions...
DIFFICULTY RATING: MEDIUM
ORIGINAL PIN:

MY ATTEMPT:
After following the how-to, I have to say - it's not as easy as it looks! (As you can probably tell...!) In a nutshell, you glue crayons to the top of your pumpkin and put a hairdryer over them so they melt and drip down. In reality, the glue doesn't really hold the crayons in place and when you heat it up, it obviously melts the glue! I had my hairdryer on the hottest temperature on the lowest fan and it just wasn't working. I had to hold the hairdryer really close to the crayon and even when it started to melt, it was being blown everywhere!
In the end, we (L had to give me a hand!) decided to play hardball and grabbed a kitchen blowtorch. This obviously makes the craft more dangerous and not appropriate for children, but it did one hell of a job of melting the crayons quickly and preventing too much mess-!

Initial tools - before replacing the hairdryer with a kitchen blowtorch and popping some foil on the stalk to prevent burning.

Soak crayons to remove paper sleeves (much easier to peel off this way!).
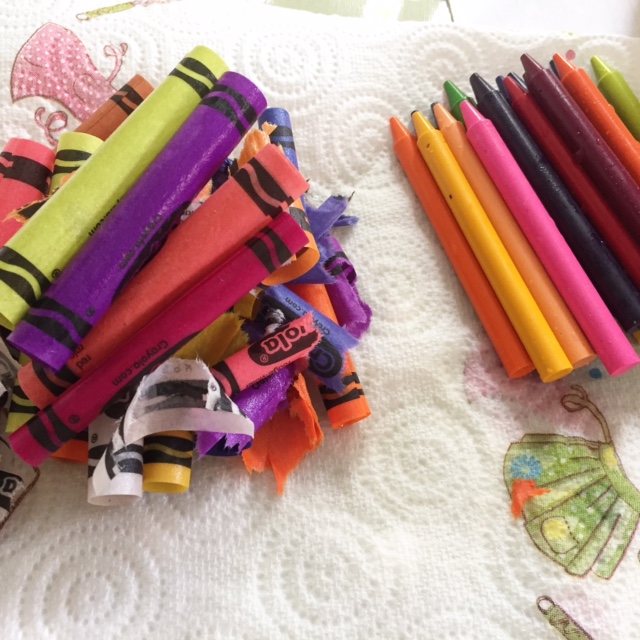
Place crayons on kitchen roll to dry off.

Snap crayons in half as you don't need a whole crayon for melting.
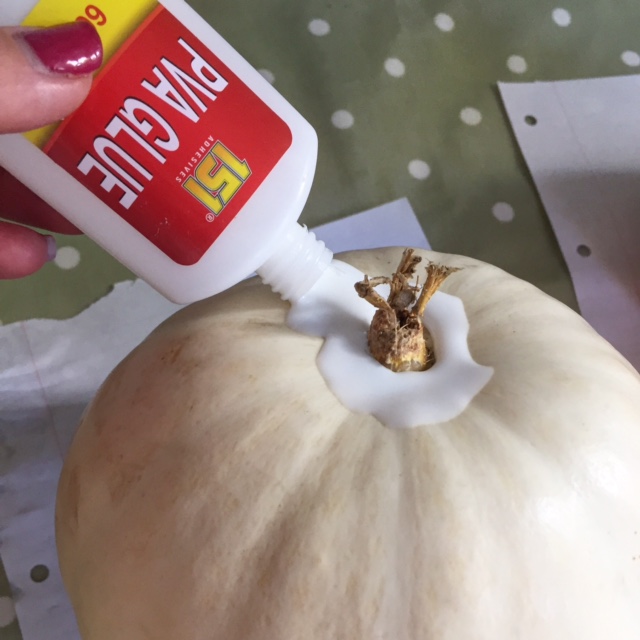
Add PVA glue to the top of the pumpkin.

Place crayons on top. Leave the glue to set a bit if you can.

You have to laugh: This is what happened when I used a hairdryer. It went EVERYWHERE and wasn't giving the drip effect I was after.
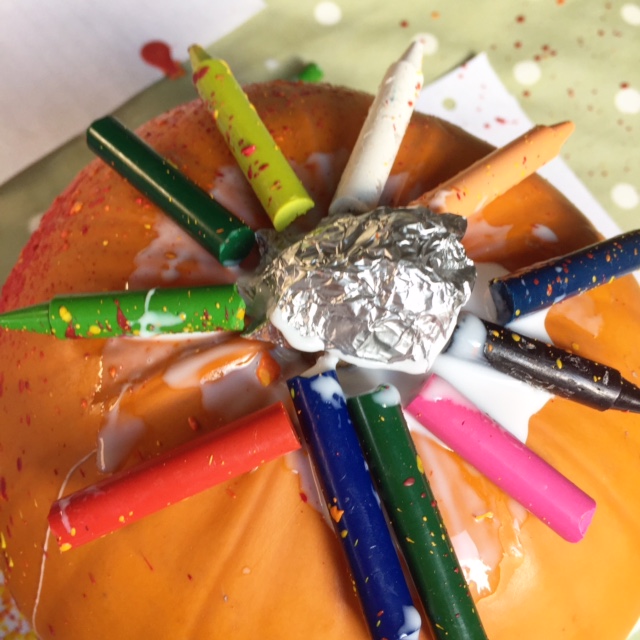
Attempt two: We replaced the hairdryer with a kitchen blowtorch and covered the stalk with foil to avoid burning.

MUCH more effective! (But also more dangerous as you're dealing with a naked flame).

As you can see, a VERY messy craft so cover all surfaces!
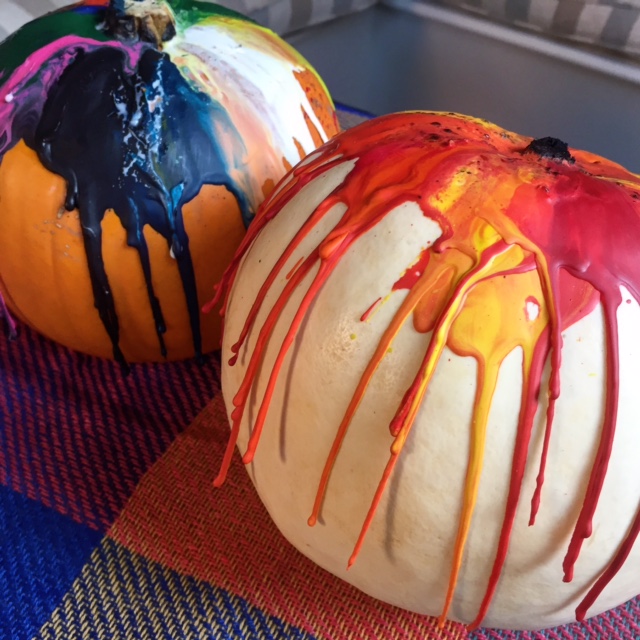
THE END RESULT:

Not the prettiest but I like this crafty look - fun, messy and a great way to jazz up plain pumpkins.

Place on a coaster to avoid staining your furniture.

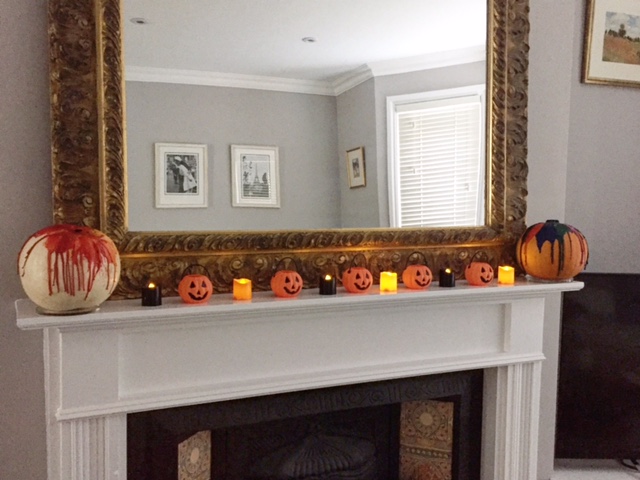
I added mine to each side of our fireplace to balance it out.
TOP TIPS
- Use a kitchen blowtorch. Otherwise it takes ages, isn't very effective and melted crayon gets blown everywhere
- Definitely NOT a child-friendly craft as a result
- I wouldn't place paper under your pumpkins are you're using a naked flame with the kitchen blowtorch. The ones in the picture were there when we were using a hairdryer
- Cover your pumpkin stalk with some foil to avoid burning
- Don't melt the crayons too much otherwise you start to burn the pumpkin beneath
- Much easier when there's two of you but you have got to be SO careful when tilting the pumpkin to get the drips as you're dealing with an extremely hot open flame
- Ghost pumpkins with oranges, reds and yellows look particularly autumnal
- Always keep out the way of children and pets as the dried crayons can peel or break off (why I put them up high on our fireplace)
- Don't place pumpkins directly on furniture as they can stain it (I used candle coasters underneath mine).
VERDICT
This is a pretty dangerous Pinterest project - because of our use of the kitchen blowtorch. But if you're careful and smart with the process, the end result looks really good! (Well, not exactly as it does on Pinterest but I love the colour and texture it adds to the pumpkins / your Halloween home decor.) It's definitely something a bit different to the popular carved and drilled ones you see on Pinterest these days. If I were to do it again, I'd probably buy more black and orange crayons to give them a more eerie look.
I'd say this Pinterest project was achievable but don't be fooled by how perfect they come across in your Pinterest feed. I think the messier the better.
Discover more of my favourite Halloween craft ideas via my board on Pinterest.
YOU MIGHT ALSO LIKE...